
bits4bots
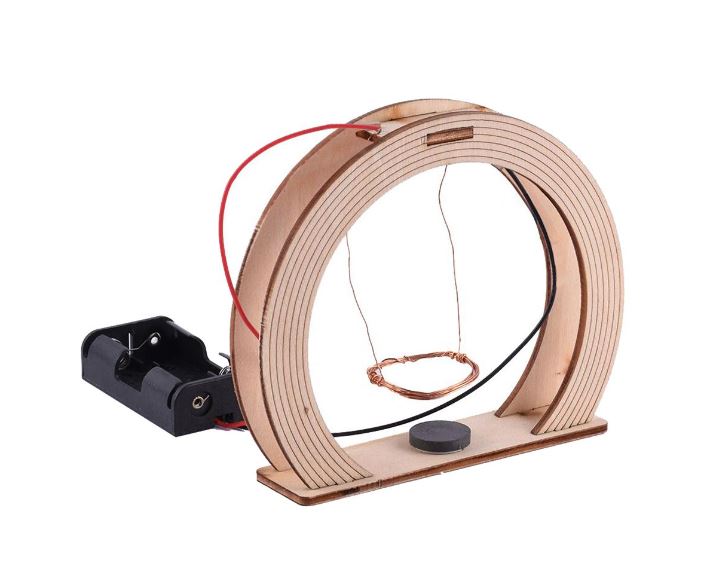
DIY Electromagnetic Swing STEM Kit - Kids Wooden Toys Science Experiment Technology Electromagnetic Swing STEM Educational Puzzle
Couldn't load pickup availability
Experimental principle:
The principle of electromagnetic swing: After the wire is energized, a magnetic field will be generated around the wire. If the wire is wound into a coil, this magnetism will be increased. In this experiment, the copper wire has a layer of insulating film, which produces magnetism after being wound into a coil and energized. The more turns of the coil, the stronger the magnetism. The coil interacts with the permanent magnet below. Due to the characteristics of the magnet, the poles of the same level repel each other and the poles of the different levels attract each other. After the coil is pushed open, one end of the copper wire will be disconnected from the battery box wire and the power will be cut off, and the copper coil will disappear magnetically. Affected by gravity, the copper coil magnetism disappears. When it returns to the lowest point under the influence of gravity, one end of the copper wire will be connected to the lead of the battery box again, and the coil will generate magnetism again. This will reciprocate and swing back and forth with the iron shaft as the axis, like swinging on a swing.
Experimental steps:
1. Insert the two uprights into the round holes in the middle of the edge of the base respectively.
2. Insert the four shaft sleeves on the iron shaft as shown in Figure 2.
3. Insert the iron shaft into the uppermost round holes of the two uprights to adjust the position of the shaft sleeve. The function of the shaft sleeve: the outermost sleeve of the iron shaft is used to fix the position of the iron shaft, and the inner sleeve of the iron shaft is used to adjust the position of the coil.
4. Paste the double-sided adhesive on the lower end of the round hole in the middle of a pole.
5. Connect the red wire of the battery box to the iron shaft (the end of the wire is connected to the end of the pole with double-sided tape).
6. Wind the copper wire into a coil as shown in Figure 6 (it can be wound on your own battery), and then use sandpaper to polish the red square area in the picture (the middle area of one end of the coil and the top area of the other end, about 2 Cm or so).
7. Twist both ends of the coil into a hook shape (children’s operation requires the assistance of a parent or teacher in this step) and then hang the coil on the iron shaft. (Note that the coil is polished at one end of the middle area and placed on the end with double-sided tape)
8. As shown in Figure 8, pass the lead wire at the other end of the battery box through the round hole on the pole with double-sided tape, and stick the double-sided tape on it.
9. Stack the two magnets on the lower end of the coil. Now that you have assembled it, install your own battery and have a try!
Materials
Materials
Shipping & Returns
Shipping & Returns
Dimensions
Dimensions
Care Instructions
Care Instructions

